When we really break down exercises into their fundamental components, we will see that they consist of a few basic movements. Squat, hip hinge, lunge, horizontal push/pull, and vertical push/pull, keeping this in mind. Of course, our bodies are unique, and we may find that conventional lifting styles do not fit us or target the areas that we would like. A sumo-deadlift is an excellent alternative to the traditional deadlift and may help you to reach new weights, increase comfort or target the muscles you would like more effectively.
Sumo Deadlift with Barbell
Objective
- The objective of this movement is to pick a weight up off the ground and set it down in control while maintaining appropriate form. The hip hinge movement means that we are moving primarily across the hip joint, unlike the squat that encourages movement at the hips, knees and ankles.
Joints Targeted
- The sumo deadlift is a full-body, pull-based exercise, this means many different joints will be targeted however, the primary joint we will focus on for movement is the hip (acetabular) joint. One thing that should be noted when trying a new stance for hip hinging or squatting is that there are different types of hip sockets. If you find yourself in a lot of pain in the hip or that it feels like there is bone on bone contact you may have a shallow hip socket and you should avoid wider stance sumo deadlifts.
Muscle Groups Targeted
-
Agonists
-
- Gluteus maximus
- Hamstring group
- Adductor magnus
-
Stabilizing muscles
-
- Erector spinae
- Rectus abdominis
- Internal/external obliques
- Gluteus minimus/minimus
- Gastrocnemius
- Latissimus dorsi
Starting Position
-
- Starting with your barbell on the ground, position your feet approximately double your shoulder width as if you are mimicking a sumo wrestler, your toes should be forward or slightly angled outwards. Your shins should be vertical and knees in line with your ankles
- Test out your position by reaching your arms straight down to the bar, can you keep your knees in line with your ankle?
- If your knees are collapsing in try toeing out slightly if this persists bring your feet a little closer to the midline and reassess.
- If you are finding your knees easily pushing outside your ankles then try turning your toes directly forward if you still find this is happening try a wider stance
- Test out your position by reaching your arms straight down to the bar, can you keep your knees in line with your ankle?
- Once your foot position is established your grip on the bar will be directly below your shoulders, as if you drew a straight line from your shoulder to the bar.
- Extend your arms out and push your hips backward as if you are already doing a deadlift, this will cause your body to tilt reaching down towards the bar as you push your hips back. Once you get to the point you can no longer push your hips back allowing for a slight bend of the knees in the line with your toes until you can comfortably grip the bar.
- Ensure you have created a solid spinal position as you grip the bar. When gripping the bar push the bar as far into your palm as possible and grip tightly
- Starting with your barbell on the ground, position your feet approximately double your shoulder width as if you are mimicking a sumo wrestler, your toes should be forward or slightly angled outwards. Your shins should be vertical and knees in line with your ankles
- I generally recommend starting out with a double overhand grip. You can also choose the switch/alternate grip, hook grip, or use straps keeping in mind that straps may lead to a lack of grip strength over time if you do not incorporate some non-strap movements.
- Once you have set yourself up, think of pulling your shoulders down and back towards your lower back, this will help to extend the spine and engage the lats and spinal erectors prior to moving the bar. This is also known as packing the shoulders.
Movement
- Now that you are set up in your position with your back engaged and a firm grip on the bar, pull upwards to create a small amount of tension on the bar, this is called “Pulling the slack out of the bar”, as you do this think of pulling the bar back towards your shins to prevent it from moving forward. You do not want the bar scraping your shins on every lift, although it may happen from time to time.
- Once you have created the tension on the bar and can feel some resistance in your hands, think of pushing the floor away with your feet as you drive your hips forward. This will cause the hips to move forward allowing your stiffened back to act as a lever to leverage up the weight.
- As you become more attuned to the movement you may try cues like gripping the ground with your feet or thinking of tearing the ground with your feet to try to encourage greater glute activation during the lift.
- After you feel comfortable with the movement we want to add one more thing. We want to think about exploding through the movement with a forceful hip drive, this will cause our muscles to contract harder and allow us to move more weight.
Recommended sets and repetitions
- If you are looking to utilize your sumo deadlifts for strength gains your rep range would be 1-5 reps for 3-6 sets per session. Focus on building up the weight you are working with week over week staying about 1-3 reps from failure. Typically keeping a heavy deadlift session to 1-2 times per week to limit fatigue.
- If you are planning to use sumo deadlifts to develop more muscle in the glutes and hamstrings you will want to focus on 5-10 reps for 2-4 sets per session. Instead of focusing on building up weights in your sumo deadlifts focus on adding reps and sets to increase the weekly volume to the muscle groups to encourage more muscular growth. Again limit deadlift specific sessions to 1-2 times per week instead of focusing on accessory hip hinge, hip thrust, or other movements if you are looking to target these muscle groups.
Progressions
-
- Simple Strength progressions: Assuming 5 rep max of 100 kg
- Week 1: 4 working sets 80% of 100 = 80 kg for 5 reps
- Week 2: 4 Working sets 85% of 100 = 85 kg for 4 reps
- Week 3: 4 Working sets 90% of 100 = 90 kg for 3 reps
- Week 4: 4 Working sets 95% of 100 = 95 kg for 2 reps
- Week 5: 4 Working sets of 100% of 100 = 100 kg for 1 rep
- Assessing weekly how many reps you have left on your last set when you’re done your session if you are greater than 3 reps add an extra 1% for every additional rep you think you could have completed.
- If your third set of week 2 was 4x85kg and you felt like you could still do 5 then 5-3 = 2 add 2% on top of your 5% jump the following week.
- Simple size progression: Assuming 10 rep max of 100 kg
- Week 1: 2 Working sets 60% of 100 kg = 60 kg for 6-10 reps
- Week 2: 2 Working sets 65% of 100 kg = 65 kg for 6-10 reps
- Week 3: 3 working sets 65% of 100 kg = 65 kg for 6-10 reps
- Week 4: 4 working sets of 65% of 100 kg = 65 kg for 6-10 reps
- Week 5: 5 working sets of 65% of 100 kg = 65 kg for 6-10 reps
- Assessing weekly to see how many reps you think you can do at the end of your last set if you are able to hit the top of your rep range (10) for all of the sets and still feel you can do 2+ reps then increase the weight
- Simple Strength progressions: Assuming 5 rep max of 100 kg
- If you are increasing the weight DO NOT increase the number of sets the following week. Only change one variable at a time.
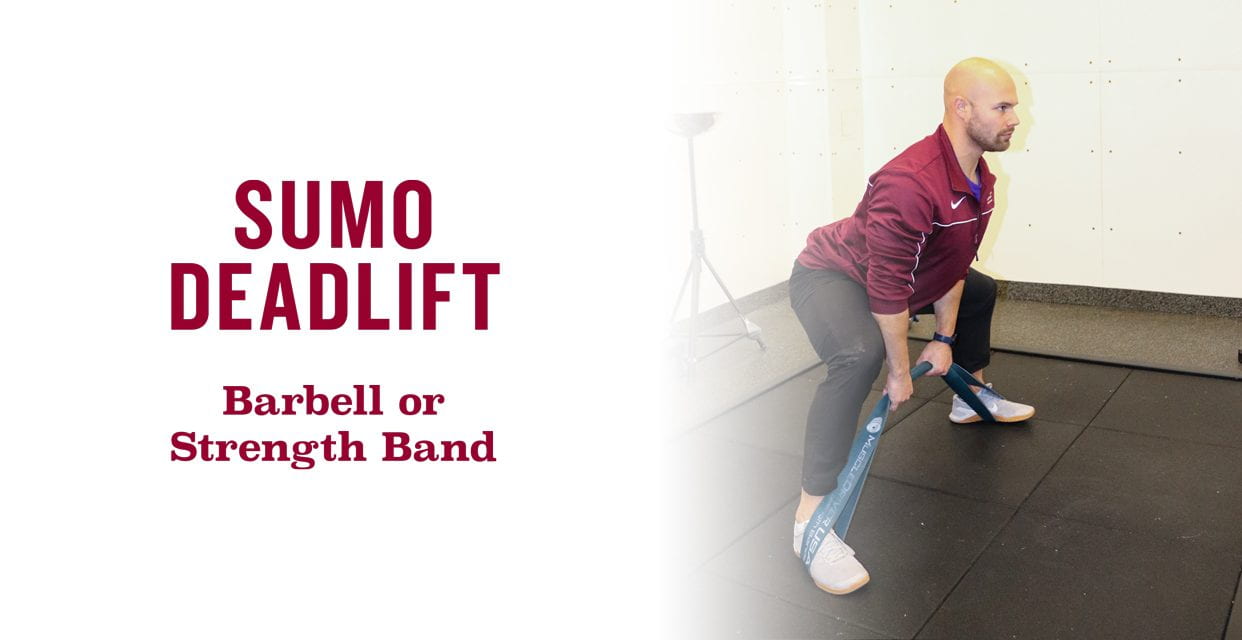
Sumo Deadlift with Band
At Home Modifications
- Stuck at home with some basic strength bands and want to try out the sumo deadlift, that’s great it’s basically the same thing as above except you will take a strength/monster band and wrap it around both of your feet then spreading your feet out to your comfortable position. Grip the band hard in the same position you would for the bar, using the same cues drive up pulling hard on the band as you do so.
- Strength bands work great for Sumo deadlifts as they more accurately mimic the stretch curve of the glutes in the movement. As you pull up on the band you will feel that the tension increases forcing the glutes to progressively work harder as the movement becomes easier for them giving your glutes a greater challenge.
- An easy way to progress this movement at home is to purchase additional bands and layer them up. You can then choose whether to grab them as double or single bands depending upon the resistance you require.
Check out Conventional Deadlift
Visit our website for information on training consultations, virtual coaching, plus individual and group personal training. If you’re ready to work with one of our Exercise Specialists, fill out the consultation form so we can connect you with the best trainer to help you meet your goals. Sign-up to receive our monthly newsletter for news, announcements, program information, swim tips, and exercise demos.
by Kyle Babiuk
Kyle is a Bachelor of Kinesiology Graduate and is certified with the Canadian Society for Exercise Physiologists. He specializes in movement analysis, chronic disease management through exercise and strength programming. He’s worked with athletes, individuals with chronic diseases, along with many other individuals trying to achieve their health and fitness goals.
